Properties, Events, and Methods (PEM) and .NET controls
See also: Properties Events and Methods
At the Fall 2008 Business Rules! Conference, Gordon Dye introduced the capability of Business Rules! to use .NET controls as an interactive part of any BR window.
This provides for extending Business Rules!, using graphically appealing controls that are unavailable in BR, and possibly overcoming some of its limitations.
System Requirements
BR Version: BR 4.2 or later.
Windows components:
- Windows 2000, or later.
- vcredist_x86.exe - Link: [3]
BR Directory:
- pemnet.dll - acts as the main bridge between .NET and BR. Link: [4]
- brconvert.dll - this library converts BR strings and numeric variables to and from .NET data types, such as DateTime.
This library can be changed to convert BR data to user-defined data types.
You may get the compiled library here: [5] or the source code here: [6]
Independent Controls
External controls can now be placed on BR windows. See the following example and parameters:
PRINT FIELDS "row,col,COMP[ONENT] rows/cols [, INDEPENDENT]": control-id$, mat properties$ [, mat events$]
INDEPENDENT signifies that the control is independently enabled and is not subject to the normal enabling restrictions associated with FIELDS operations.
Control-id$ should be in the format "mycontrol:class-name"
Mat properties$ will have property assignments (e.g. color=blue)
Mat events$ will have event assignments to fkey values (TypChanged=1035)
To clear previous settings use TypChanged= -1
Setting events is optional
The above form cannot be used in the same statement as other controls.
Other Controls
The following forms can be used in the same FIELDS array as other controls:
PRINT FIELDS "row,col, COMP [rows/cols]": mat properties$
INPUT FIELDS "row,col,COMP [rows/cols]": mat properties$
Input Processing: Mat properties$ has property names or property assignments. Any assigned values will be ignored. The array will be populated with property assignments for all specified properties.
The syntax for retrieving all of the names:
INPUT FIELDS "row,col,comp[onent] rows/cols,PROPERTY_NAMES,depth": mat properties$
INPUT FIELDS "row,col,comp[onent] rows/cols,EVENT_NAMES",
mat events$
INPUT FIELDS "row,col,comp[onent] rows/cols,METHOD_NAMES": mat methods$
To set or get individual properties:
set$("#fileno,row,col","city=Los Angeles")
set$("#fileno,row,col","address.city=Los Angeles")
get$("#fileno,row,col","city")
To invoke a method:
INVOKE("#fileno,row,col",method-name$, mat args$)
Method_name$ MUST be from the list returned by INPUT ... METHOD_NAMES in its entirety.
Method Name Examples:
Set_Text(System.String value)
SetBounds(System.Int32 x, System.Int32 y, System.Int32 width, System.Int32 height)
Note- To use Active X controls with PEM, use AXIMP.EXE (from the dot net framework) under XP or later.
Using Existing .NET controls
.NET controls are contained in a library called System.Windows.Forms.dll.
To use their public methods and properties, you do not need to write any non-BR code.
Simply copy
C:\WINDOWS\Microsoft.NET\Framework\v2.0.50727\System.Windows.Forms.dll
into your BR directory.
MonthCalendar Example
To get PEM examples and source code, download ftp://ftp.brulescorp.com/Dll_Distr/pem_demo/pem_demo.zip
The MonthCalendar control is contained in System.Windows.Forms.dll.
00100 PRINT NEWPAGE
00200 DIM PROPERTIES$(2)*500,ARGUMENTS$(1)*80
00300 DIM METHODS$(1)*255
00400 OPEN #0: "rows=40,cols=110",DISPLAY,OUTPUT
00500 OPEN #10:  "srow=11,rows=17,scol=20,cols=67,border=S",DISPLAY,OUTPUT
00600 PRINT #10, FIELDS "2,11, component 7/16,independent":"System.Windows.Forms:System.Windows.Forms.MonthCalendar", MAT PROPERTIES$
00700 PRINT #10, FIELDS "11,11,C 6,,B1000" : "Exit"
00800 DO
00900    INPUT FIELDS "14,30,C 1", WAIT=1: DUMMY$ TIMEOUT IGNORE
01000    Print #10, Fields "13,11,C 50" : Get$("#10,2,11","SelectionRange.Start")
01100    IF FKEY=1000 THEN EXIT DO
01200 LOOP
01300 STOP
01400 IGNORE: CONTINUE
PEM Data Conversion
BR offers only two data types - string and numeric. Many other types are required by various controls available for outside resources.
Concerning DOT NET and other objects, BR provides conversion routines for the purpose of working with various data types. For example you may express colors as is done in HTML (#xxyyzz) and have them converted to and from a structure with RGB values for use by a .NET object.
These conversion routines are in a separate DLL that is automatically invoked based on the field's class type when a property value is sent or received by BR via a properties array, or a GET, SET or INVOKE parameter. The DLL used to perform these conversions is included in the object toolbox DLL group located in the BR directory.
The first release of the DLL supports the following object types:
// conversion class for System.Drawing.Color
// conversion class for System.String
// conversion class for System.Int32
If there is a class that you would like to see a conversion routine for that does not exist and you wish to write one, this must implement the interface (DLL data type name) brconvert.BrConversion which has 2 methods:
int objectToString(System.String string, out System.Object value)
int stringToObject(System.Object value, out System.String string)
You must also prepend the name of the class with brconvert.BR so if you were going to make a conversion class for System.Drawing.Color the conversion class would need to be named:
brconvert.BRSystem.Drawing.Color.
PEM File Required
BR Directory-
- pemnet.dll
- brconvert.dll
- vcdlltest.exe - used for testing
Windows Dot Net Framework Use the following files to install the necessary system programs-
- dotnetfx20 (W2K) or dotnetfx35 (XP or Vista) - to install/upgrade dot net
- vcredist_x86.exe - to install a required dot net support library
There are two main groups of supporting Dll's needed to use Dot Net controls with BR:
- VC++ shared libraries. These can be tested with vcdlltest.exe and
installed with vcredist_x86.exe.
- The .Net framework. If you are using Windows 2000, you will need to
use dotnetfx20.exe. If you are using windows XP or Vista use dotnetfx35.exe.
Creating Custom .NET controls with Visual C#
To get PEM examples and source code, download ftp://ftp.brulescorp.com/Dll_Distr/pem_demo/pem_demo.zip
If the existing functionality of a given control does not completely meet your needs, then you may customize this control's behavior by adding your own code. Suppose you want a MonthCalendar control with event notifications and the ability to add events. For that, you would need to create a control, which includes a MonthCalendar and other controls and functions which you will use to create your custom Calendar.
Additional System Requirements:
Visual C# 2008 http://www.microsoft.com/express/vcsharp/#webInstall
At some point, the installer will ask you whether you’d also like to install Microsoft SQL Server Express. You can install it if you want, but it is not necessary for this presentation.
Creating a control library
Game plan: create a control containing a Calendar, an "Add Event" button, combo boxes for hour and minute selection, a text box for entering an event description, and a timer which will check every 2 seconds whether the user should be notified of an upcoming event.
1) Open Visual C#.
2) Open the File menu and choose New Project.
3) When the New Project dialog pops up, from Templates choose Class Library and type in the project name you want to use.
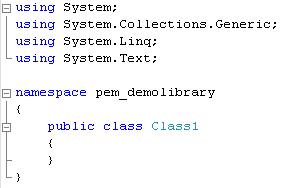
4) The following code will be auto generated:
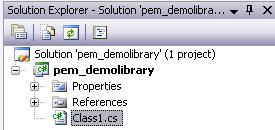
5) In the upper right corner you can find the Solution Explorer, which lists all the classes in your project.
6) We will not use Class1, so right – click on it and Delete.
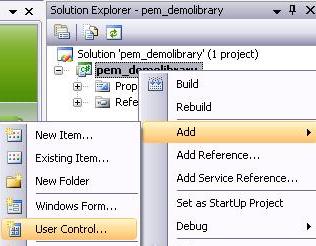
7) To add a control to this project, right – click on the project in the Solution Explorer, choose Add, and then choose User Control.
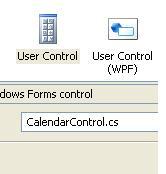
8) Rename the control from Control1.cs to a meaningful name. I chose DateTimeControl.cs.
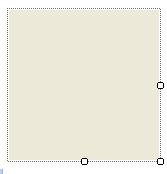
9) You should now see a blank control.
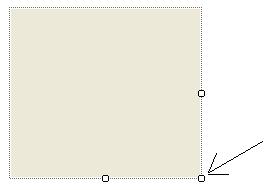
10) Make the control bigger.
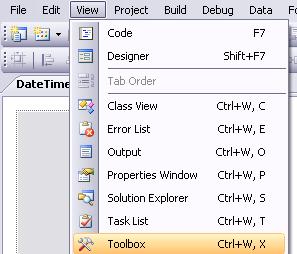
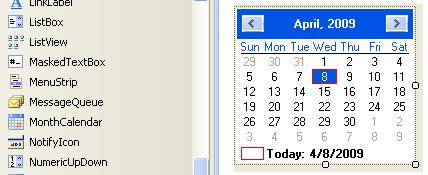
11) Open the View menu and choose Toolbox.
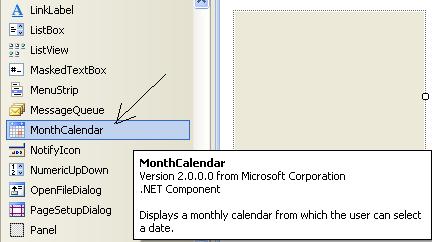
12) In the Toolbox, under Common Controls, find MonthCalendar and drag it onto your blank control.
(before)
(after)
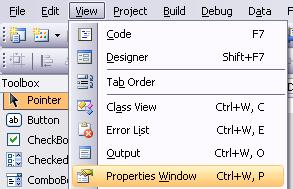
13) Open the View menu and choose Properties Window.
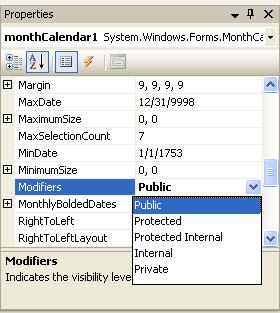
14) On the right, the Properties Window will pop up. Find the Modifier property and change its value to Public.
Now we are ready to add our customization.
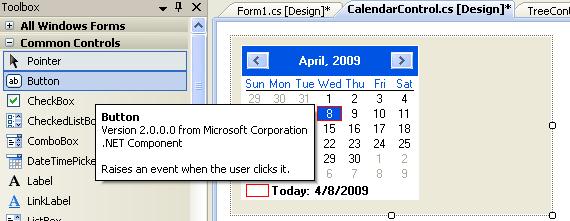
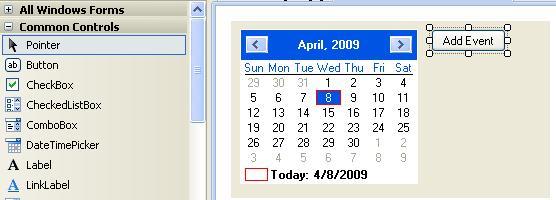
15) Let's make our control wider and drag a button onto it from the Toolbox.
(before)
(after)
16) In the Properties window, change the Text property to Add Event.
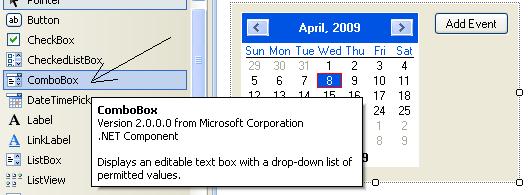
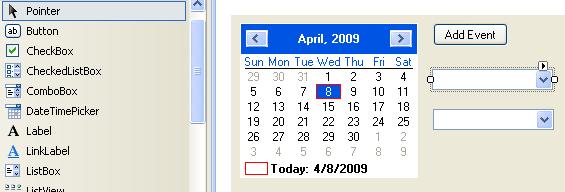
17) Now we'll add 2 ComboBox controls.
(before)
(after)
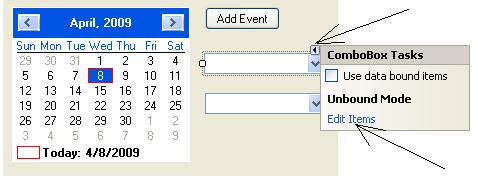
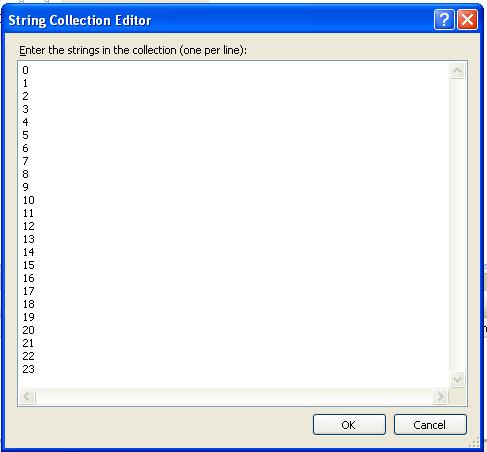
18) Now we will give values 0 through 23 to the first ComboBox (HOURS) and values 00 through 59 to the second ComboBox (MINUTES).
Select the first ComboBox, then press the small arrow in its upper right corner.
When the ComboBox Tasks dialog comes up, press Edit Items.
When the String Collection Editor comes up, type in 0 - 23, one per line.
Similarly, give the 2nd ComboBox values 00 - 59.
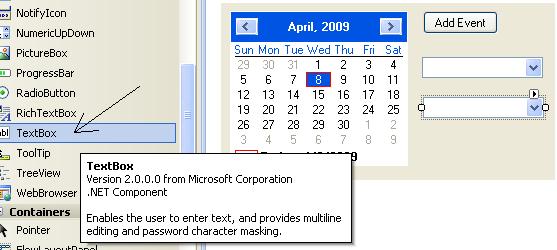
19) Now let's add a TextBox for event description.
(before)
(after)
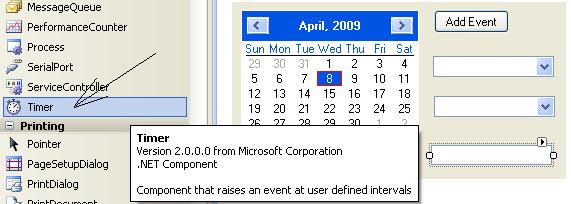
20) Now we'll add a Timer.
The Timer is NOT a component that will be visible on our custom control.
(before)
(after)
Note that the Timer shows up not on the control, but BELOW it.
Yet the Timer is still tied to our CalendarControl.
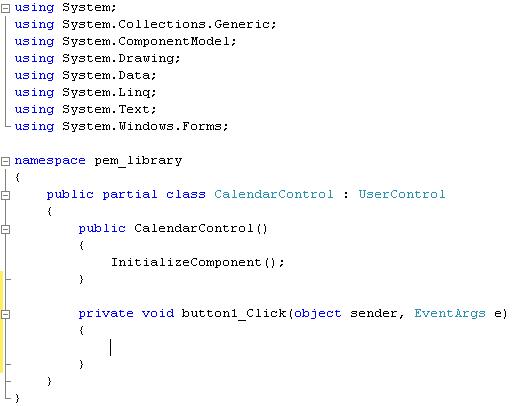
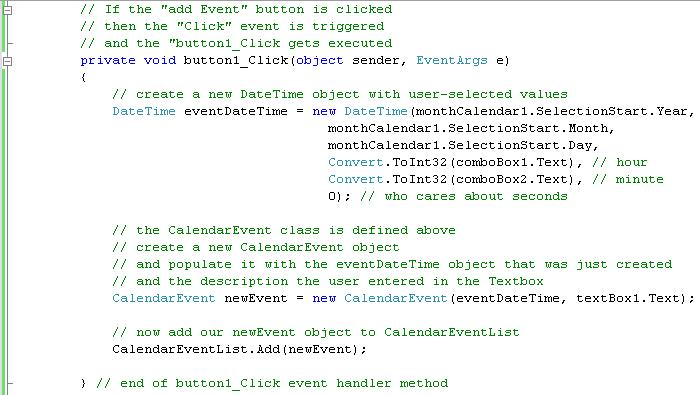
21) Now double-click on the Add Event button.
This should generate an event handler stub for what happens when this button is clicked while the CalendarControl is running.
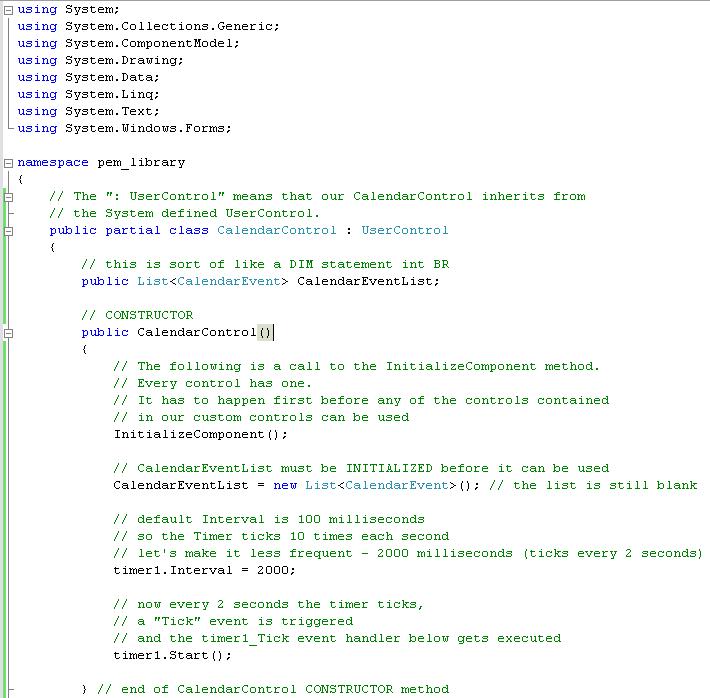
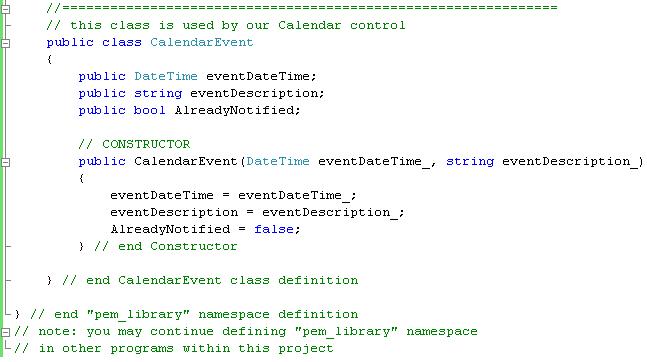
22) Now we are ready to write some CODE.
To get PEM examples and source code, download ftp://ftp.ads.net/Dll_Distr/pem_demo/pem_demo.zip
Replace the above code with the code below.
This would actually be a very short program if all the comments were removed.
23) Open the Build menu and choose Build Solution.
24) By default, all your projects are saved in 'My Documents\Visual Studio 2008\Projects In your Projects directory.
Navigate to pem_library\pem_library\bin\Release. Copy pem_library.dll to the directory where Business Rules resides.
25) The following BR program uses our control:
00100 PRINT NEWPAGE
00200 DIM PROPERTIES$(2)*500,ARGUMENTS$(1)*80
00400 OPEN #0: "rows=40,cols=110",DISPLAY,OUTPUT
00500 OPEN #10: "srow=11,rows=17,scol=20,cols=67,border=S,caption=Custom Calendar",DISPLAY,OUTPUT
00600 PRINT #10, FIELDS "2,11, component 9/35,independent": "pem_library:pem_library.CalendarControl", MAT PROPERTIES$
00700 PRINT #10, FIELDS "12,11,C 6,,B1000" : "Exit"
00800 DO
00900    INPUT FIELDS "14,30,C 1", WAIT=3: DUMMY$ TIMEOUT IGNORE
01100    IF FKEY=1000 THEN EXIT DO
01200 LOOP
01300 STOP
01400 IGNORE: CONTINUE
To get PEM examples and source code, download ftp://ftp.ads.net/Dll_Distr/pem_demo/pem_demo.zip

